Stash & Spending

Saturday, August 29, 2015

Arches

So I've been away for a really long time, and now that I have a full-time job, my free time is really limited.  I'm basically gone for 12 hours a day on Mondays - Fridays (yay long commutes), and when I get home, I'm very exhausted.  However, I do have other interests outside of nail art, so I must be very intentional with how I spend my free time.

Sometimes I play video games.  Sometimes I color.  Recently though, my priority has been shifted to making birthday cards for friends.  And when I have the time and the inspiration, I paint my nails.

Sorry in advance if this blog is not as active as you would have hoped.

Here is my most recent manicure:


For this manicure:
  • Base Coat - Bonder by ORLY
  • Base Colors - In the Lime Light by China Glaze, Shrimply Devine by Sally Hansen Complete Salon Manicure, aruba blue by essie, & Tribeca Silver by NYC
  • Top Coats - Out the Door by inm & Matte Me Crazy by NYC
  • Tools used - striping tape
Approximate Completion Time: 2 hours


I've been watching a lot of nail artists work their magic on instagram.  The general trend for multi-layer designs is to seal the bottom layers with a fast drying top coat first, and then continue onto the rest of the design.  It's such a simple yet genius concept!  I wish I really had considered that sooner.  It would have made my other nail art less time-consuming, or even allowed me more time to make more intricate designs!

The world of nail art is fast evolving, and I'm really enjoying seeing all these different designs and techniques surface :)

I am currently thinking up new designs, so hopefully I get around to painting my nails again soon!  Additionally, I have a shipment of polish coming from Julep and another one from Sephora which should arrive soon...very excited for nail mail :D

That's all for now.  Have a wonderful day, my friends! :)


Sunday, July 26, 2015

Wedding Nails

My Bible study leader from my Freshman year of college got married this past weekend, so I had the honor of witnessing the confirmation of their love in holy matrimony :) it was the first time I've attended a friend's wedding.  Thankfully it was super casual, so I get to slowly practice appropriate wedding etiquette.  My knowledge and understanding of wedding etiquette will come in handy for the next 10 years as my friends get engaged and married!

But friends, if you're reading this, please pace out your weddings so I can attend all of them and not skimp out on wedding presents :D

My dress was a nice mint color, so I wore these nails to help encourage the summer spirit:


For this manicure:
  • Base Coat - Bonder by ORLY
  • Thumb, Ring, & Pinky - coral polish by bonita, Saaya by Julep, & Laree by Julep; stamped with royal blue by b.m.c using BM-023 plate by Bundle Monster; gradient made using make-up sponge
  • Pointer & Middle - coral polish by bonita, Saaya by Julep, & Laree by Julep; gradient made using make-up sponge
  • Top Coat - Out the Door by inm
Approximate Completion Time: 2 hours


To be perfectly honest, I was internally freaking out about how fancy I wanted my nails to be.  I can't have nicer nails than the bride...can I?  I don't think she ever saw my nails, so I think I was able to get away with this set of nails this one time.  Actually this is the one thing I still need to figure out, and I'm sure it varies by bride.

SO LADIES.  IF YOU'RE GETTING MARRIED AND I'M A GUEST, PLEASE LET ME KNOW HOW TONED DOWN MY NAILS ARE SUPPOSED TO BE BECAUSE I CLEARLY DON'T KNOW.

Alright, that's enough from me for today.  Have a wonderful day, and I hope I will be able to post again soon! :)


Monday, July 13, 2015

Interrupted Stardust

Hello!  After much running around and trying to get my life sorted out, I am back in sunny Los Angeles (and I got a sunburn basically as soon as I came back ;_; why).  My life still isn't sorted out, but that's okay because I at least got to paint my nails!

Everything is better with a set of new nails:


For this manicure:
  • Base Coat - Base Coat by Finger Paints
  • Thumb & Pinky - Lainey by Julep, neon blue stud from BornPrettyStore
  • Pointer & Ring - Lainey by Julep & Corinne by Julep; stripes made using striping tape
  • Middle - Corinne by Julep
  • Top Coat - Top Coat by Out the Door
Approximate Completion Time: 2 hours


The beige/sand color is a textured polish which Julep has appropriately dubbed as a "Stardust Finish".  It's different from a sand finish because the polish is also sparkly...like stardust.  I mean technically sand is also sparkly.  I know because I've gone to the beach at least once before.

There's just something about this color combination...

Well my life still isn't 100% together, but I mean I'm only like 22 and I still have time.  So although I am internally freaking out, I am also taking the time to enjoy it each step of the way :) 

Okay that is all for now.  Thanks for reading this post and I hope you have a wonderful day! :)


Friday, July 3, 2015

Independence Day Nails

Hello all!  This is odd for me; I usually don't post this often.  But here I am, a Permanent Resident dwelling on this American soil.

Happy birthday, America.  It's been 239 years since your birth and you've come a long way.  Still got a long ways to go, but I'm sort of happy that some positive changes have been made so far.

Here are my Independence Day nails for this year :)


For this manicure:
  • Base Coat - Double Duty Base & Top Coat by Sally Hansen
  • Thumb, Ring, & Pinky - Bunny by Julep & Molly by Julep; stripes made using transparent tape
  • Pointer & Middle - Char by Julep & Bunny by Julep; dotted star made using a dotting tool
  • Top Coat - Double Duty Base & Top Coat by Sally Hansen
Approximate Completion Time: 1.5 hours


This deep blue polish is a perfect polish because the color is amazing AND it's opaque in one coat.  ONE COAT.  ONE COAT WONDER ALERT.

Anyways, have a festive 4th of July!  Remember to drink responsibly, drive sober, and anything you say can and will be used against you.


Thursday, July 2, 2015

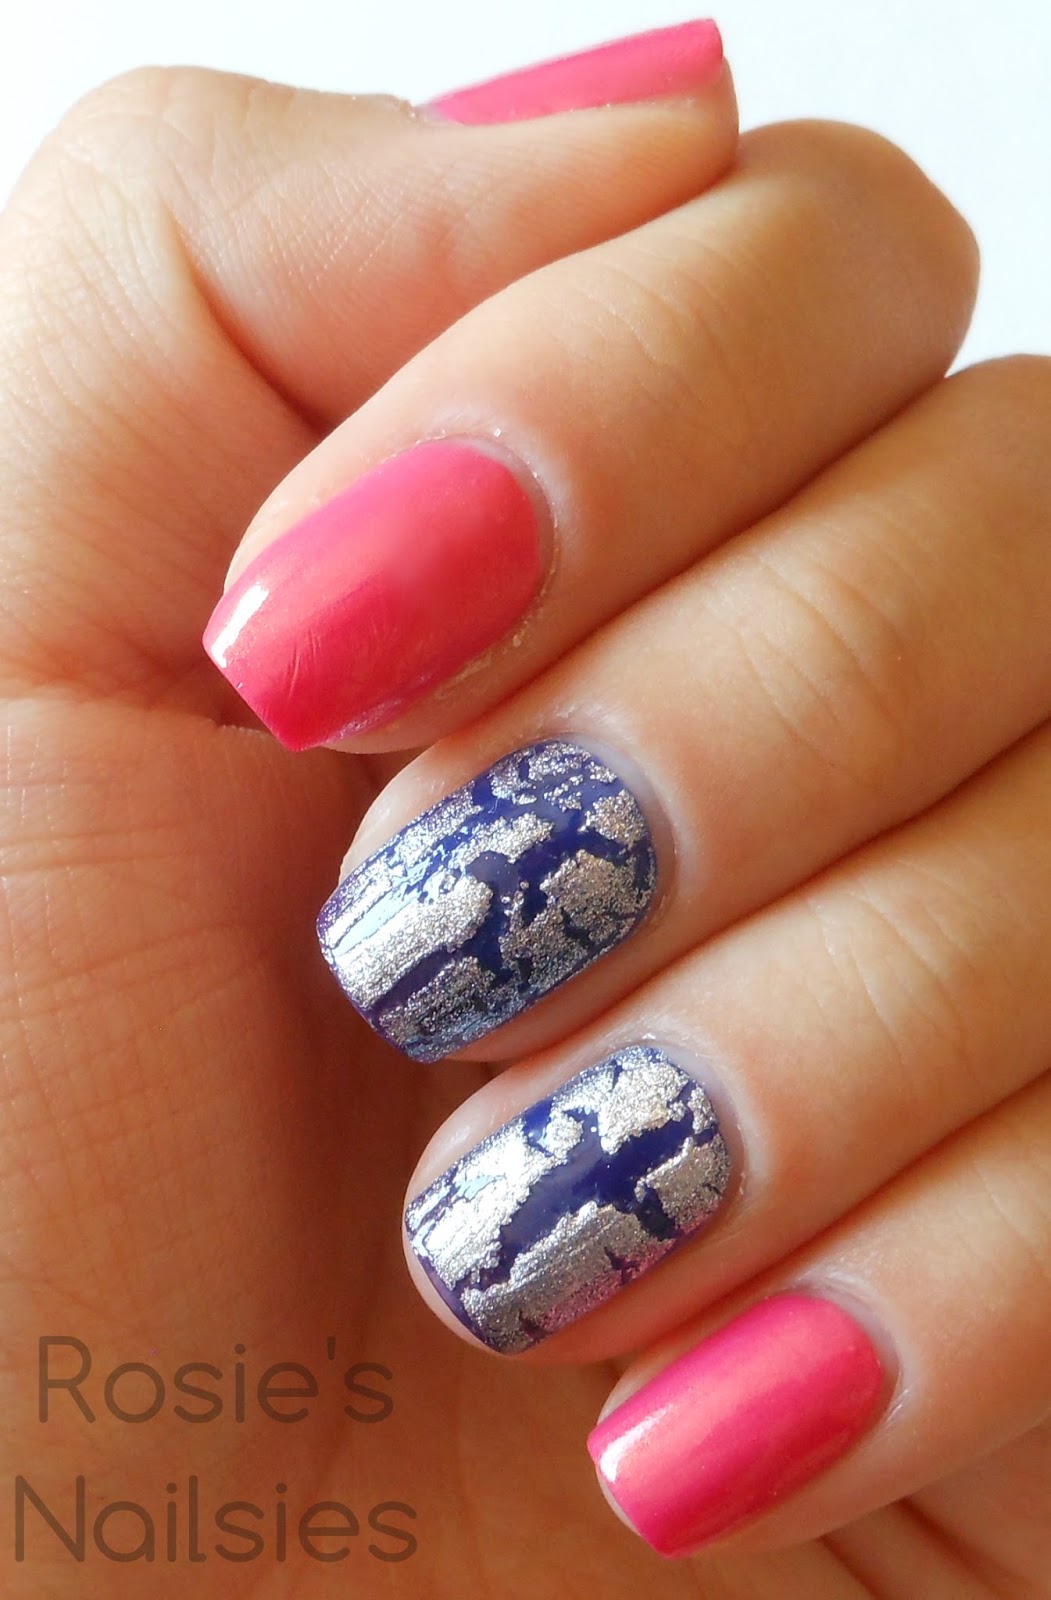
Silver Shards on a Subtle Gradient

Hello!  If you follow me on Instagram, you know that recently I made the life-changing decision to change from my usual oval nail shape to my current square nail shape.  I'll be keeping my square nails for at least a year to see what it's like throughout the year.  Maybe even longer.

If you don't follow me on Instagram...why not?  You should :)

But without further ado, here is my first nail art design on my square nails!


For this manicure:
  • Base Coat - Double Duty Base & Top Coat by Sally Hansen
  • Thumb, Pointer, & Pinky - Laree by Julep
  • Middle & Ring - Char by Julep, Alexis by Julep, & Glenda by Julep; gradient made using a make-up sponge
  • Top Coat - Double Duty Base & Top Coat by Sally Hansen
Approximate Completion Time: 2 hours


Even I can't see the gradient that well in real life, unless if I'm intentionally looking for it.  Also, this is the first time I've used crackle/shatter nail polish.  I remember when they were first introduced and people went CRAZY over them (back in 2011??) and now here I am, 4 years later, finally jumping on the hype train.  But the hype train has already up and left.  There's only one person on the train and that's me.

Remember how I said that I still had older posts to upload?  Well if you happen to see me flaunting oval nails in any future posts (during the next year), just know that those are from my stash of old posts that I need to upload.  I am not switching from oval to square to oval to square.  I'm just late to this function.

Thank you for taking the time to read this.  I hope you all have a wonderful day! :D


Tuesday, June 16, 2015

Nintendo Nails / Legend of Zelda Nails

Hello all!  I hope you are all as hyped as I am for this year's E3!  :D  If you're not...don't worry about it.  Just video game things being presented.  If that's not your cup of tea...well, if that's not your cup of tea, how the heck do you de-stress and fall into a new world?

Anyways, this past Sunday (14 June 2015), I was able to fill up my entire day with Nintendo-related events.  In the morning, I lined up at LA Live to get a Nintendo wristband for the Nintendo World Championships, which took place that afternoon.  During the evening, I attended the Legend of Zelda: Symphony of the Goddesses - Master Quest concert at the Walt Disney Concert Hall, also in Los Angeles.  It was a Sunday fun day Nintendo day for me!  On a side note - special wristbands were given to people who cosplayed, so that they were able to sit closer to the front and therefore have an increased likelihood of being on camera during the filming of the event.  I got a special wristband for wearing a Legend of Zelda themed shirt.  I really don't think that counts as cosplay, but I'm not complaining.  You can find me smiling and pointing at the camera for a few glorious seconds in the full-length recording of the Nintendo World Championships :)

My nails were dressed for the occasion.  On my left hand, we have my Nintendo-themed nails:


For this manicure:
  • Base Coat - Base Coat by Finger Paints
  • Colors - Bunny by Julep, Ruby Ruby by Sinful Colors
  • Tools - dotting tool
  • Top Coat - Top Coat by Out the Door
Approximate Completion Time:  1.5 hours


I often think about that one video of that kid getting a Nintendo 64 console on Christmas and freaking out about it.  I feel the same about Nintendo.

And then, on my right hand, we have my Legend of Zelda themed nails - specifically, Legend of Zelda: Ocarina of Time:


For this manicure:
  • Base Coat - Base Coat by Finger Paints
  • Base Color - Fiore by Julep
  • Thumb (Triforce) - Nadia by Julep, good as gold by essie; design made using a striper brush
  • Pointer (Kokiri Emerald) - Happy Ending by Sinful Colors, green glitter by Shades of the Season, good as gold by essie; design made using a dotting tool and a striper brush
  • Middle (Goron Ruby) - Ruby Ruby by Sinful Colors, red glitter by Shades of the Season, good as gold by essie; design made using a striper brush
  • Ring (Zora Sapphire) - Endless Blue by Sinful Colors, blue glitter by Shades of the Season, good as gold by essie; design made using a dotting tool and a striper brush
  • Pinky (Navi) - Char by Julep, Endless Blue by Sinful Colors, Jeanne by Julep, Shelly by Julep; design made using a dotting tool and a striper brush
  • Top Coat - Top Coat by Out the Door
Approximate Completion Time:  1.5 hours


You can tell that posing with my dominant hand and taking pictures with my non-dominant hand is definitely not my forte.  And especially since I had to do a weird pose to make all five of my digits visible!

The key for doing these nails is to make DIY nail art stickers!  :)  If there is any interest for a tutorial on how to do that, let me know.  I mean, alternatively, you can look it up on the internet, because literally that is what the internet is capable of - it is a world wide web full of information in every corner.

Thank you for taking the time to read this post.  I'm currently still in the process of getting life figured out (read that as "applying for jobs and trying to function as a normal adult"), so that takes up a huge portion of my time.  So sorry.  Actually just kidding I'm not sorry.  I need a job.  Student loans are not kind o.o

I hope you all have a wonderful day! :)


Tuesday, June 2, 2015

Beach Day Fun Day! Nails

Hello all!  I apologize for my absence - it was caused by a plethora of events that all snowballed into each other and here I am, finally with the right sense of mind and enough decency to get back into blogging.

OH ALSO!  I got featured in a blog recently :) the blog owner likes to showcase the bare nails (and base coated nails) of nail artists.  It was really awesome to know that someone found my blog and contacted me for a feature :) anyways, you can find pictures of my bare naked nails here and my bare naked nails with base coat here :) additionally, click here to check out the rest of Natalia's blog!

So after my last post, my sister came to visit me for her spring break, so it was like I enjoyed spring break all over again.  Then my boyfriend broke up with me (so he's my first ex now; how odd), so I had to deal with all the emotions that came with that.  But don't worry you guys - I'm in a better place now, and every day I'm healing and finding more and more things to be thankful for every single day :) And then finals week happened, so I was "studying" for my "exam".  After finals week was graduation, which was boring, exciting, and hectic.  I got to spend time with my family so that was nice.  And after graduation, I had to move things out of my old apartment and into my new apartment (just subleasing for the summer), and also I've been applying to jobs.

I also bought a pet bunny! :D

But in the meantime, I have been painting my nails regularly.  If you follow me on Instagram, you might have seen my nail art.  However, I haven't been posting because of all the messiness that I had just described.

So here I am, making a post again after disappearing from the face of the internet.  I went to the beach recently, and I love the beach because I'm originally from Colorado, and they have no beaches there.  I like how I can just sit on the soft, warm sand and stare at the ocean and...it's so timeless.  There is something so soothing about staring at a wide expanse of water and realizing that in the end, everything is going to be okay.  I may be dealing with a lot of problems, but I will get through this.

It was a nice day at the beach though.  Here are the nails I had on for that day:


For this manicure:
  • Base Coat - Base Coat by Finger Paints
  • Thumb, Ring, & Pinky - Nadia by Julep & Shrimply Devine by Sally Hansen Complete Salon Manicure; gradient made using a make-up sponge
  • Pointer & Middle - Kimberly by Julep, Too Yacht to Handle by China Glaze, good as gold by essie, & neon orange square stud from BornPrettyStore; polish was sectioned off using striping tape and gold line was added using a striping brush and stud was placed on using top coat
  • Top Coat - Top Coat by Out the Door
Approximate Completion Time: 2 hours


So since I have a better grip on myself mentally and emotionally now, I will be posting about the nail art that I have created previously during my period of recession/dormancy.  I may or may not also be doing collaborations with other bloggers, so just keep an eye out :)

And as always, thank you for taking the time out of your day to read this post.  I really do appreciate all of you!